Homemade Chocolate Covered Cherries
Make delicious homemade chocolate covered cherries with just a few simple ingredients. A sweet candied fruit treat perfect for gifting, holidays, and easy desserts.

Homemade Chocolate Covered Cherries
Homemade Chocolate Covered Cherries are a classic sweet treat that’s surprisingly simple to make and always irresistible. Juicy candied cherries are dipped in smooth, melted chocolate to create a rich, bite-sized confection that’s perfect for gifting, dessert platters, or holiday celebrations. This easy recipe delivers the perfect balance of fruity sweetness and creamy chocolate in every bite, and can be customized with dark, milk, or white chocolate. Whether you’re preparing homemade candy for the festive season or just craving a quick indulgence, these chocolate covered cherries come together beautifully with minimal effort. They store well, taste amazing, and always impress guests. Find more ideas 👉 Delicious No bake dessert
FAQ’s and Tips
Can I use fresh cherries instead of candied cherries?
Yes, but fresh cherries will release juice. If you use them, make sure they’re completely dried before dipping, and keep the finished treats refrigerated.
What chocolate works best for dipping?
Good-quality melting chocolate, candy melts, or chocolate chips with a teaspoon of coconut oil work wonderfully. Dark chocolate creates a more sophisticated flavor, while milk or white chocolate gives a sweeter finish.
How long do chocolate-covered cherries last?
Candied cherry versions last up to 2 weeks in an airtight container at room temperature. If using fresh cherries, refrigerate and enjoy within 2–3 days.
Why is my chocolate not smooth?
It may have overheated. Melt chocolate slowly, preferably using a double boiler or short microwave bursts, and stir often to keep it silky.
Can I make these ahead for gifting or parties?
Absolutely! They store well and are perfect for holiday platters, edible gifts, or party treats.
Ingredients for Homemade Chocolate Covered Cherries
- dark chocolate
- candied cherries
Tips for Perfect Chocolate Covered Cherries
- Dry the cherries well. Moisture causes chocolate to seize and prevents a clean coating.
- Use a fork, skewer, or dipping tool. This helps the chocolate drip off evenly and keeps your cherries round and smooth.
- Chill before serving. Let the coated cherries set on parchment paper in the fridge for 10–15 minutes.
- Decorate for flair. Drizzle with contrasting chocolate, add sprinkles, or dust lightly with cocoa powder.
- Store in layers. Place parchment between layers to prevent sticking and smudging.
How To make Homemade Chocolate Covered Cherries
- Break the chocolate bar into random pieces and place in a bowl. Melt the chocolate in a microwave or over a double boiler until the consistency of condensed milk. Cool the chocolate for 2 minutes.
- Prepare a silicone mold for candies or ice cube trays. Fill each heart shaped mold halfway.
- Drown the cherries in the chocolate.
- Fill the mold to the top with melted chocolate. Refrigerate for 1 hour.

- Serve the candies on a board or in a box tied with a ribbon, and this small gesture is sure to melt your Valentine’s heart.

- Store the candies in a cool, dry place or in the refrigerator to maintain freshness.

Whether you’re preparing homemade candy for the festive season or just craving a quick indulgence, these chocolate covered cherries come together beautifully with minimal effort. They store well, taste amazing, and always impress guests.

These Homemade Chocolate-Covered Cherries are such a delightful no-bake treat, bringing together simple ingredients and rich, irresistible flavor. If you’re craving even more sweet inspiration, be sure to explore our Delicious No Bake Dessert collection for easy, fuss-free treats. Browse our full Dessert Recipes selection, including A Selection of Cakes Recipes, Cookies and Snack Bars, and Pastries and Pies and Pavlova recipes, and Oven-Baked Puddings. There’s always another tempting recipe waiting to make your dessert table shine.
Recommendations
(click the highlighted heading for the recipe)
- Homemade Pumpkin Chocolate Covered Oreo’s
- Chocolate and Peanut Butter Balls
- Simple Marshmallow Pops for Valentine’s
- Homemade Easy Nutella Bonbons
Homemade Chocolate Covered Cherries
Make delicious homemade chocolate covered cherries with just a few simple ingredients. A sweet candied fruit treat perfect for gifting, holidays, and easy desserts.
- Prep Time: 10 min, setting time 1 hour
- Total Time: 1 hr 10 min
- Yield: 15 1x
- Category: Desserts
- Method: Stove top No Bake
Ingredients
- 3 1/2 ounces’ dark chocolate
- 15 candied cherries
Instructions
- Break the chocolate bar into random pieces and place in a bowl. Melt the chocolate in a microwave or over a double boiler until the consistency of condensed milk. Cool the chocolate for 2 minutes.
- Prepare a silicone mold for candies or ice cube trays. Fill each heart-shaped mold halfway.
- Drown the cherries in the chocolate.
- Fill the mold to the top with melted chocolate. Refrigerate for 1 hour.
- Serve the candies on a board or in a box tied with a ribbon, and this small gesture is sure to melt your Valentine’s heart. Store the candies in a cool, dry place or in the refrigerator to maintain freshness.
Shop my Favorite Amazon Finds to purchase online. The kitchen appliances and décor will suit the recipes you bake, something different. You may also get any other items for the house hold and kitchen.
This post may contain affiliate links, where we earn from qualifying purchases. See more details in the policy page. Does not effect your purchase cost.
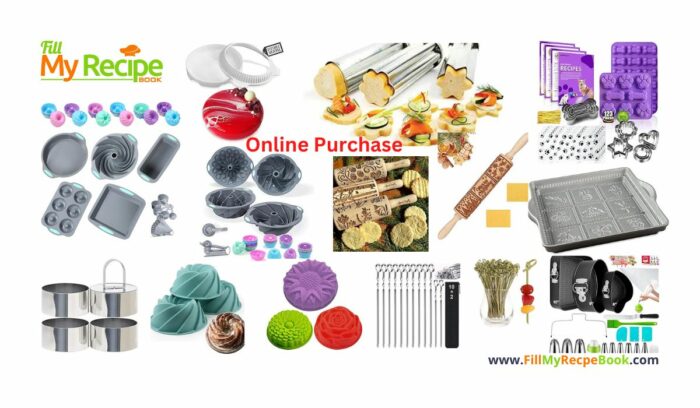
A Selection of Bakeware Molds
A Selection of Bakeware Molds to bake mini cakes or larger cakes. Sets of baking pans silicon or nonstick, and skewers and kebobs, stainless.